Talk to and assist your website visitors
Live chat with Active Screen Sharing
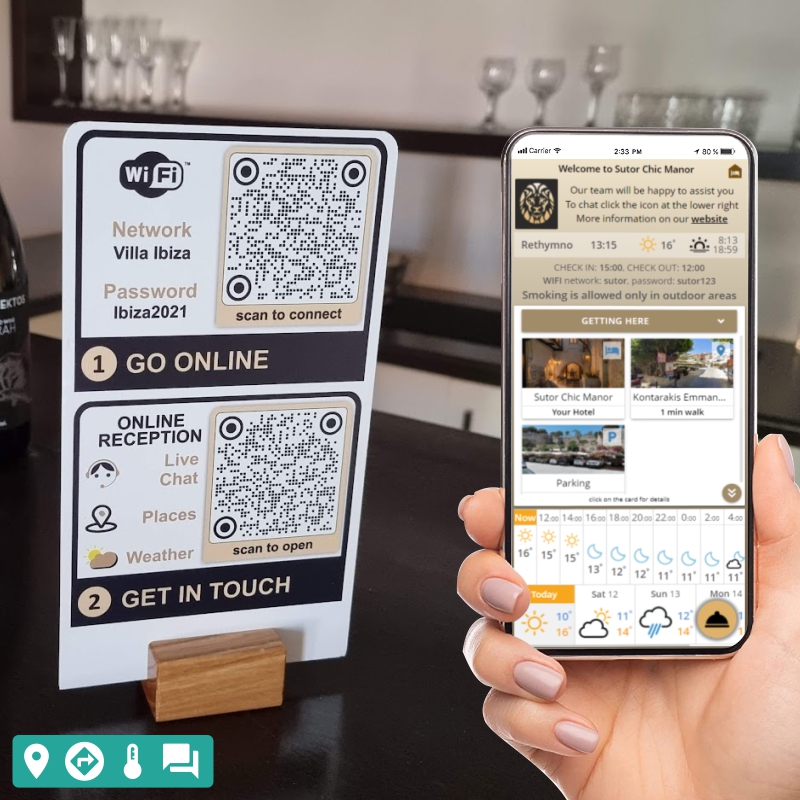
Guest App for your guest
Guest App, where your guest will find everything they need, include your help with any questions 24/7.
Ready to go immediately. No website required.

Best Guest Experience
A Guest App that will make the guest's check-in and stay as comfortable as possible and will bring you the best ratings, customer gratitude and significant financial savings
Guest App DEMOSmart Access
Automatic check-in without your participation. Your guests can open the necessary doors directly from the Guest App or using codes. Fully automatic creation and sending of instructions for smart access to the property.
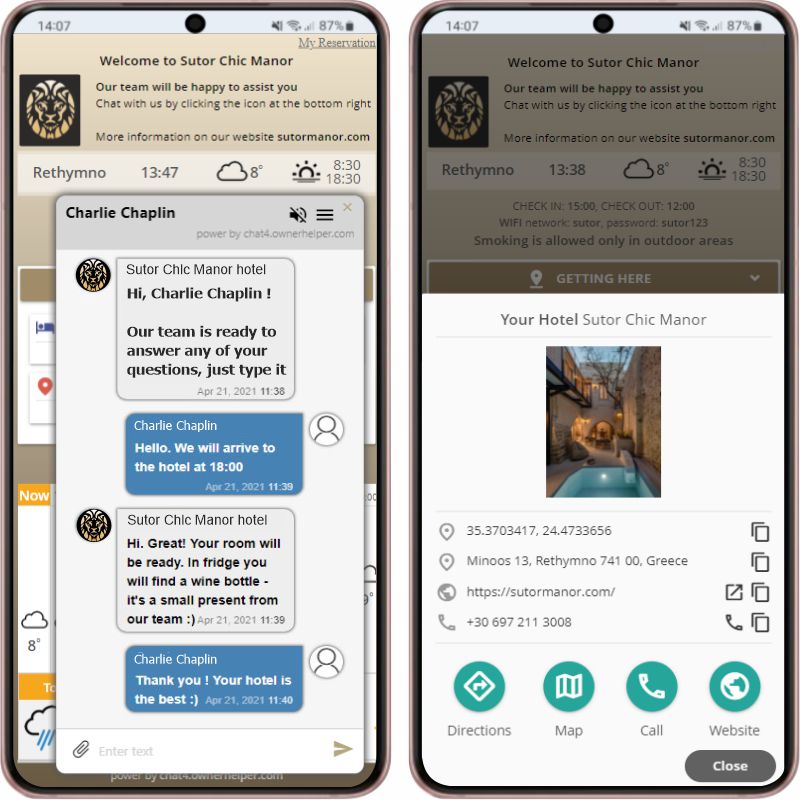
Live Chat
Maps and Directions
Navigation to your property, parking, etc. with one click
Places
Places catalog (restaurants, transport, establishments) with maps and directions
Weather
Local weather, detailed hourly and weekly forecasts
QR-sticker editor
Built-in editor, with which you can print bright QR-stickers in a couple of minutes
Smart access for any type of hotel property
Modern access system. Self Сheck-in. Remote control.
Access to property from the Guest App or by code. Remote opening of doors by your staff
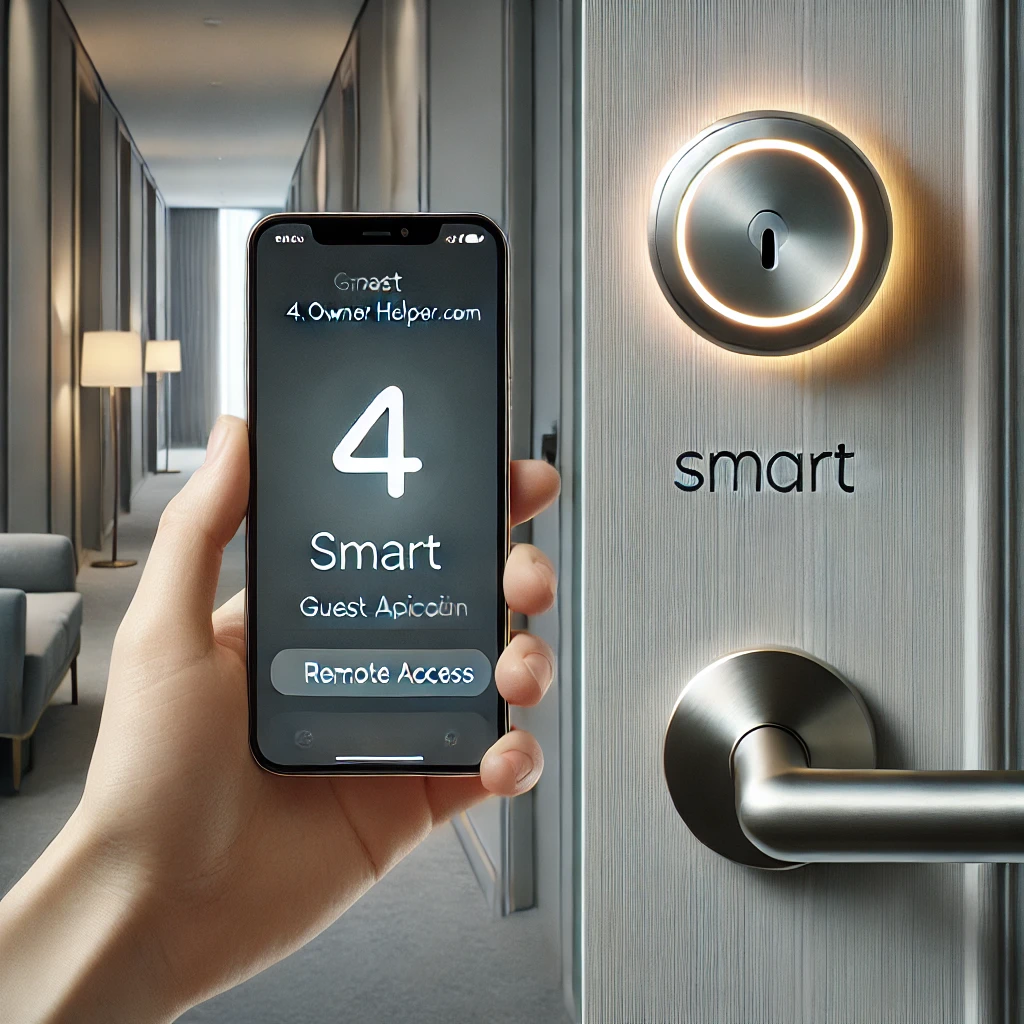
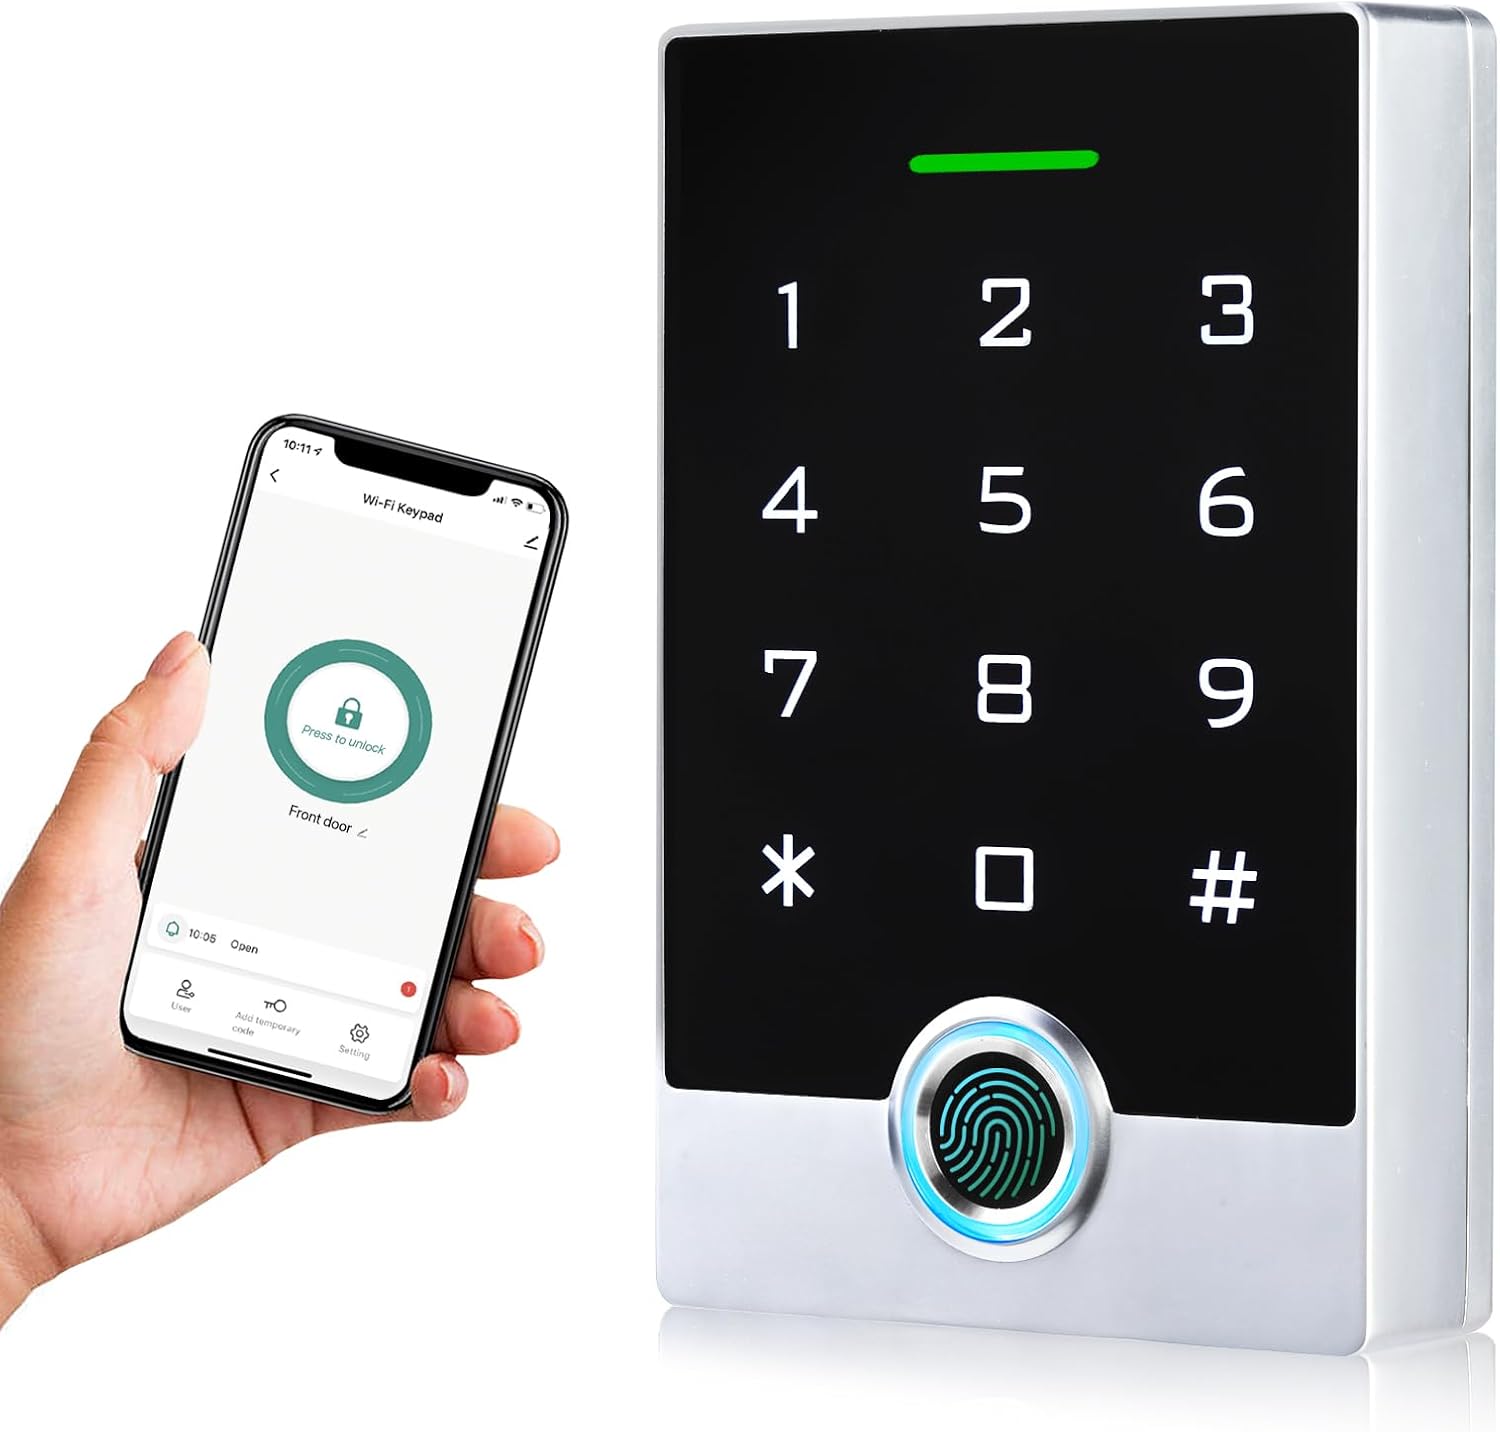
Smart Seamless Guest Access
Uncompromisingly convenient guest access at any time of the day
Self check-in without your participation
• opening directly from the guest's phone screen (Guest App)
• using a temporary lock password with a time limit in accordance with the guest staying
• remote opening by your staff
Guest App DEMOSelf check-in without your participation
• opening directly from the guest's phone screen (Guest App)
• using a temporary lock password with a time limit in accordance with the guest staying
• remote opening by your staff
Easy setup
For each room, you configure which doors should be accessible to the guest.
For example
- The entrance door to the building from 12:00 on the day of arrival until 21:00 on the day of departure
- The door to the room from 15:00 on the day of arrival until 12:00 on the day of departure
For example
- The entrance door to the building from 12:00 on the day of arrival until 21:00 on the day of departure
- The door to the room from 15:00 on the day of arrival until 12:00 on the day of departure
Automatic instructions
At a preset time (for example, the day before check-in), the system configures the appropriate locks and sends the guest a link to their guest app and check-in instructions with lock codes.
Safety
All access options (code or guest app) only work within the set time. Guest will not be able to open the lock before or after the set time.
Lock history
For each lock you have access to a log of openings, where you can easily check when a guest arrived or when the cleaning lady arrived.
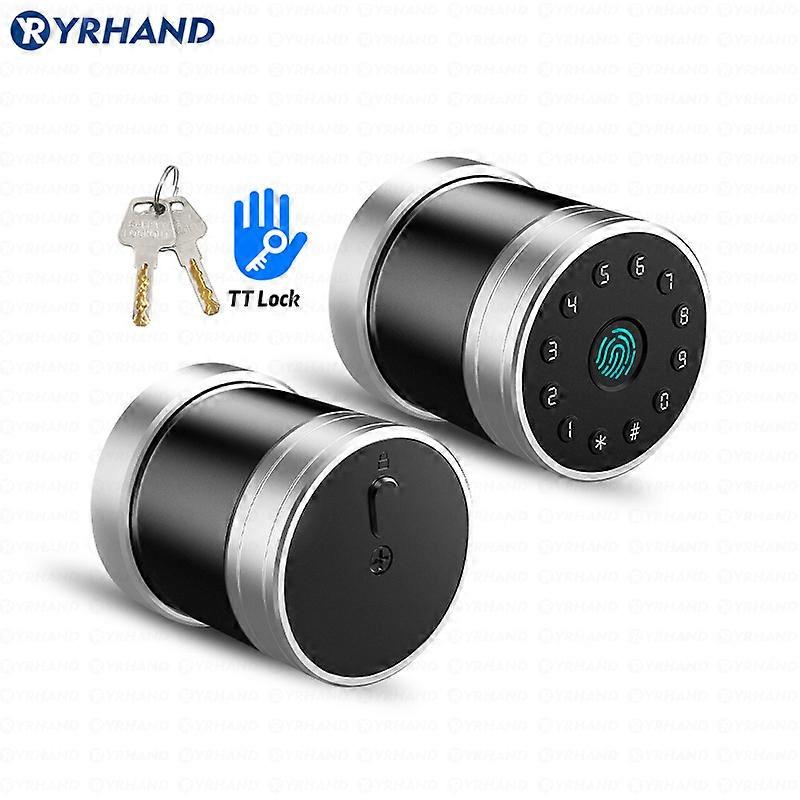
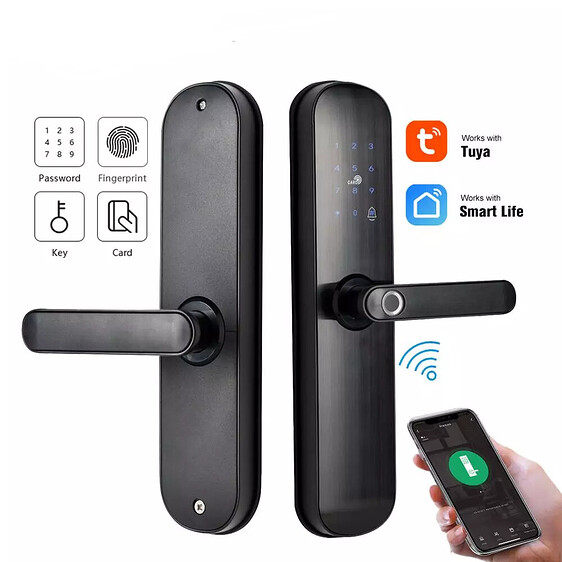
Old Keypad support
Along with modern WiFi smart-locks, the system supports simple code keypad panels with a static code
Compatibility with cards
All modern locks can be set to open with traditional access cards. This way, the guest can use the Guest App or Сode for the initial check-in and then use the card to access the room.
Step by step instructions
The guest app provides a step-by-step check-in process with detailed photos and instructions, helping the guest get into their room as easily as possible.
Smart locks Brands
Our system is compatible with locks from more than 50 manufacturers that supports SEAM, TUYA or TTLOСK API
Smart Automation for any type of hotel property
Fully customizable control scenarios for smart devices in your Property
Save Your Money. Improve the experience of your guests


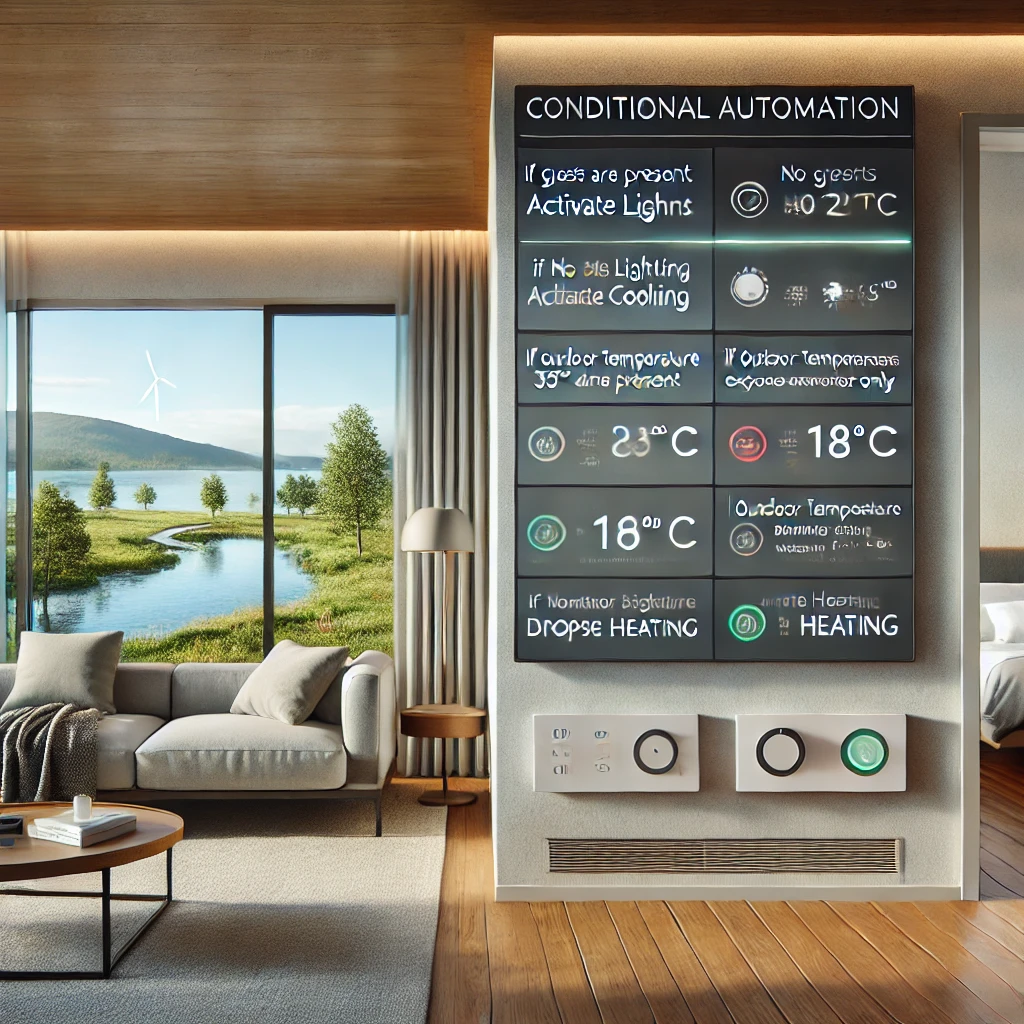
Everything you need ON and OFF
Turn ON and OFF electrical appliances automatically depending on the presence / absence of guests and other conditions
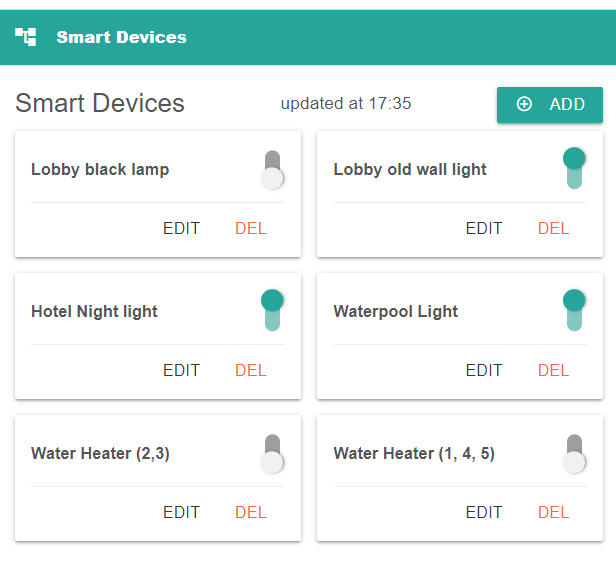
Compatibility
Compatible with common smart device manufacturers. EWELINK, TUYA, SONOFF, XIAOMI, SMARTLIFE. GOSUND. Lights, Heaters, Water boilers, Air Conditioners, Pool, etc
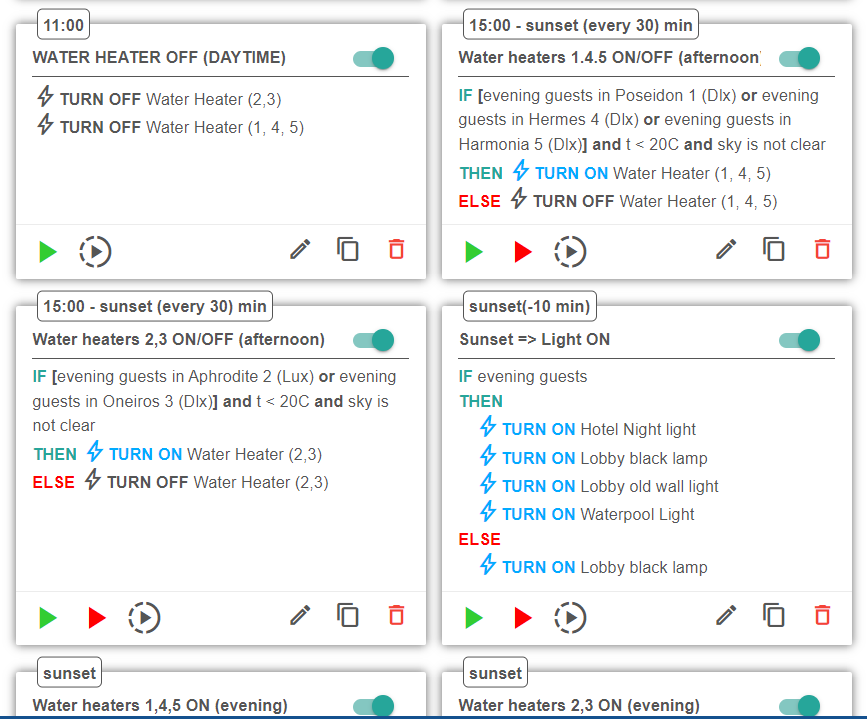
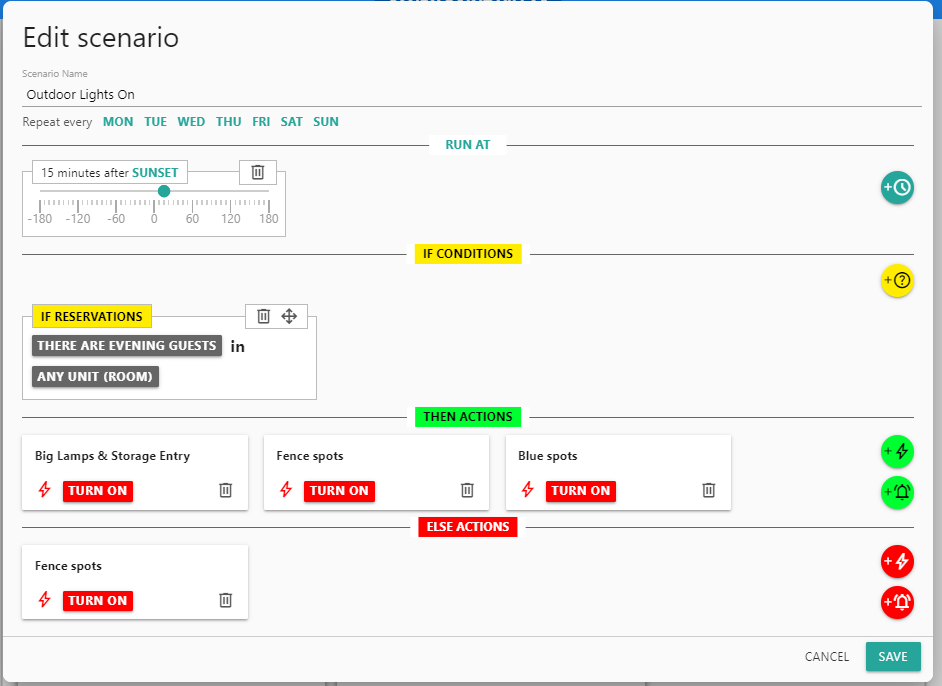
Smart Scenarios
Combine a variety of conditions including bookings, weather forecast, sunrise or sunset times, day of week, etc
Manual control
Contorl any device directly from your phone at any time. Your entire team has access to devices and scenario management
Notifications
Receive notifications on your phone when a scenario is triggered
Easy setup
Easy setup right from your phone. Just a few minutes to make your hotel/rental smart.
Remote Front Desk for Hotels and AirBnb
With one click, your guests can make a video call to your administrator
Ready to go immediately. No website required.
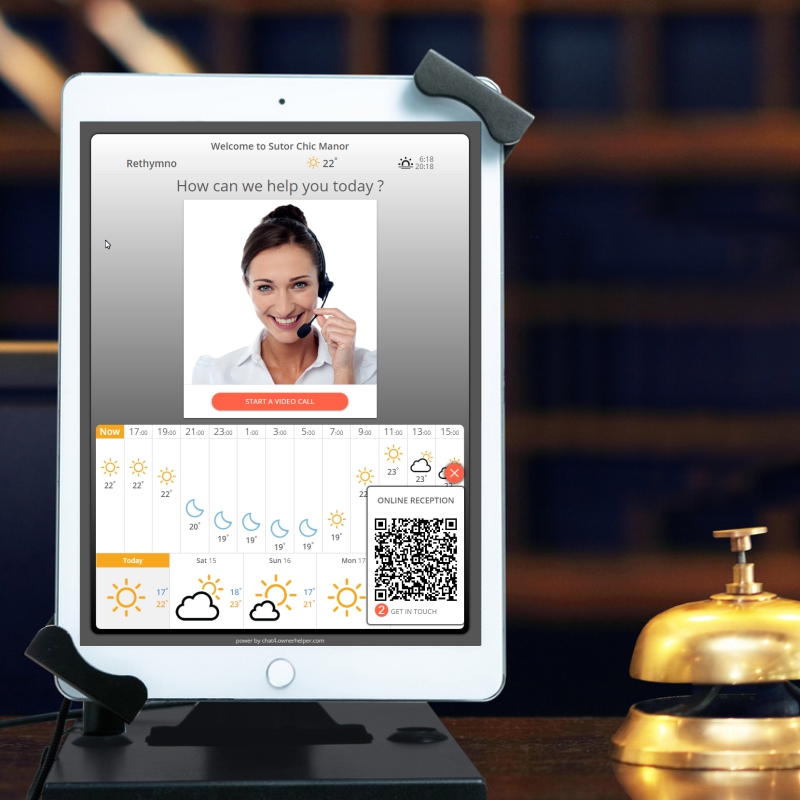
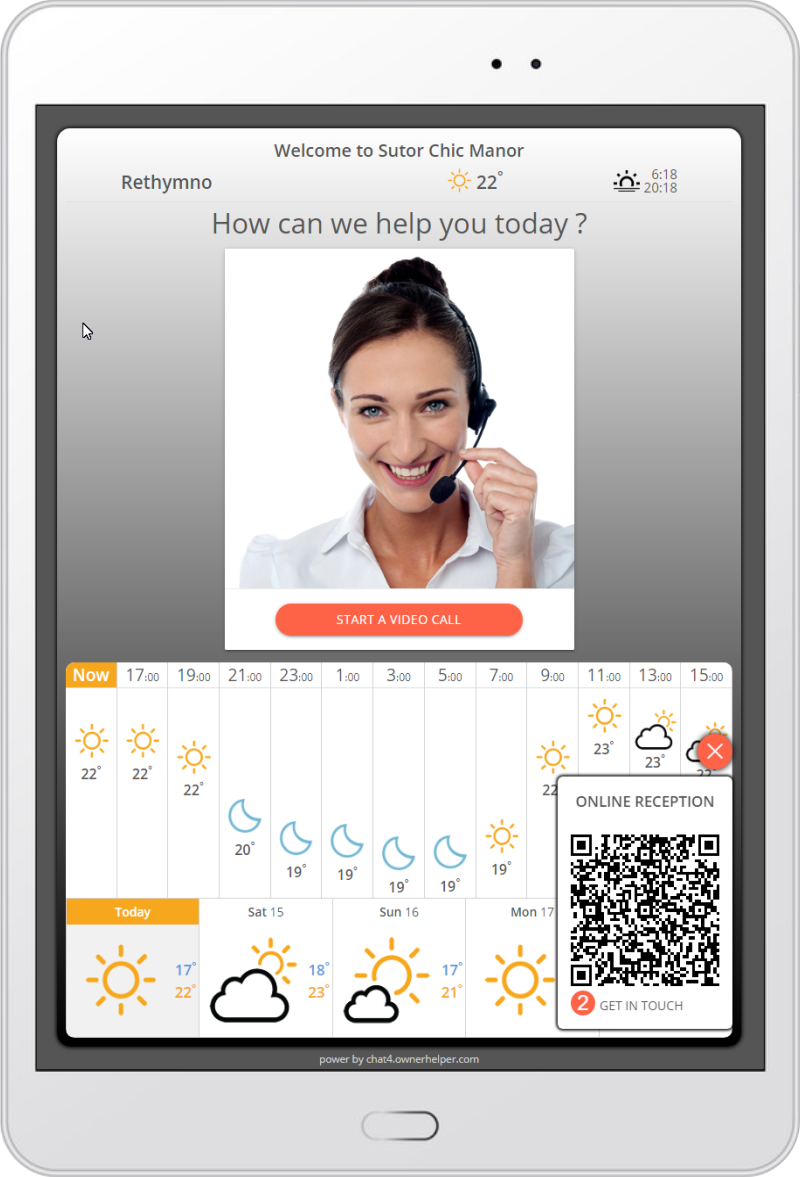
No website required
The service is ready to work immediately. All that's needed is to install a tablet on your Front Desk counter
Live Video Chat
With one click, your guests can make a video call to your administrator who will check-in or help resolve any issue as if he or she were at the front desk.
Staff resources
By using a Remote Front Desk as the main point of service or as an additional support for your on-site staff, you can make the most of your human resources and adapt to the flow of guests.
Weather
Local weather, detailed hourly and weekly forecasts
Wi-Fi
QR-code code to quickly connect guests to the hotel Wi-Fi and Online Reception
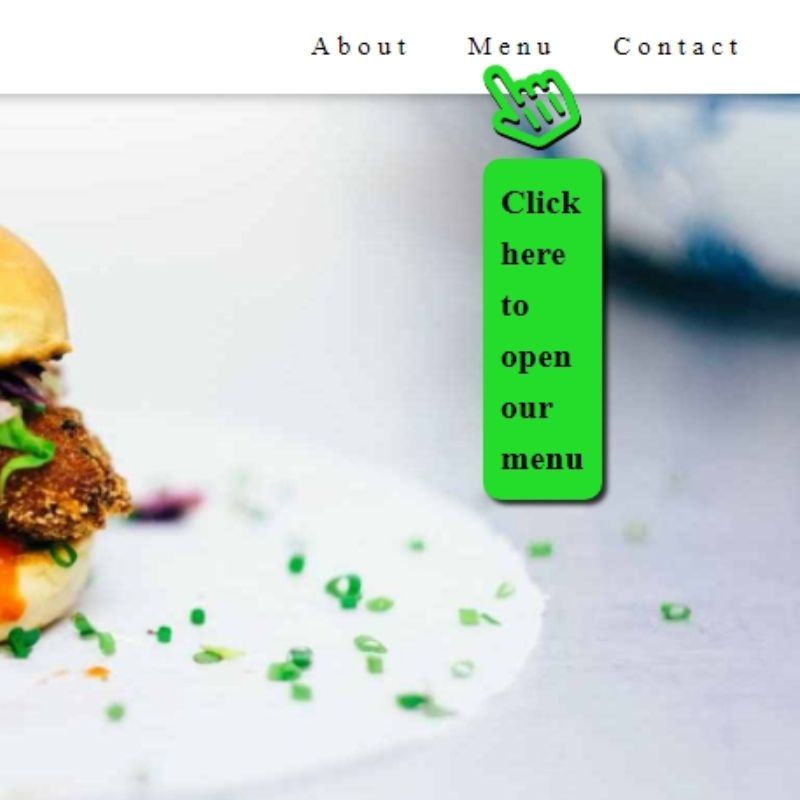
Live Chat Widget for any Website
Answer questions, solve problems, increase conversions
Add live chat to your website and talk with your website visitors in real-time

Embed in a website in 1 minute
Just copy the ready line of code and paste it into your website code
How embed widget ?Includes a smart bot powered by OpenAi(Chat GPT) artificial intelligence
Your best agent working in chat 24/7
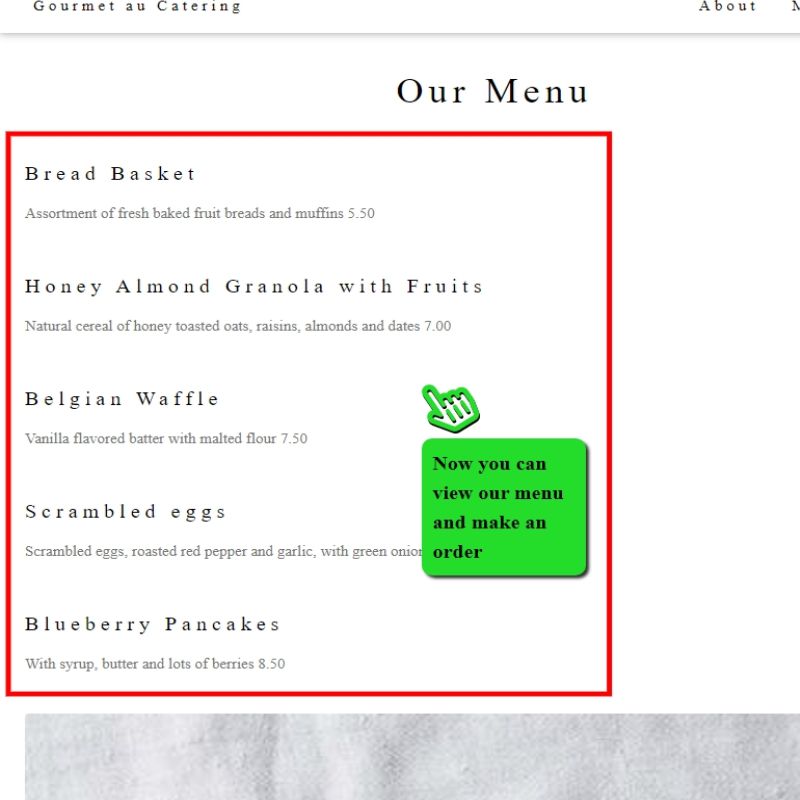
Click for demo - our AI bot is waiting for youRemote sharing of visitor screen
A unique opportunity to help the client by directly observing his screen with an active pointer
Click for demoGateway for Messenger, Viber, Telegram
Your clients can communicate through instant messengers right from their phone
How the gateway work?Built-in translation for any language
Instant translation of messages written in any language into yours
Audio and video 2-ways chats
Two-way video and audio chat opens up new possibilities
Real-time visitors monitor
Track who is currently viewing your site with the ability to initiate a chat from your side
Try SMART4 today
Service that is always with you
No credit card required • Free plan available • No website required
- help_outlineFAQ Frequently Asked Questionsexpand_moreGeneral QuestionsChat ListCreate new chatClick the button `Create new chat`.
Fill in all the fields of the form.
Save the form.How many chats can I create?The number of chats depends on the selected subscription type.SettingsOperatorsConnect operatorClick `Links and QR codes to connect support team members.`
Connect the operator in several ways:
1. Provide your operator for scanning the QR-code of a convenient communication channel in the form of a picture or photo.
Click on it with the right mouse button and select `Save image as ...`
2. Follow the direct link of a convenient communication channel.
3. Copy the link to the clipboard and send it to the operator by email or in any other convenient way.Set the operator access level.Select the one you need in the window:
1. SUPERVISOR - communicates with clients in the chat and monitors the work of operators.
2. operator - only communicates with clients in the chat.How many operators can I connect?The number of operators is not limited.General Profile SettingsProfileCorrect the information entered during registration.Customize the user menu in chatSlide the switches to display the desired information in the chat.Operating hoursSet the switch to the desired position:
1. Around the clock - if operators can respond to customers at any time of the day.
2. Schedule - set working hours daily and schedule operator days off.
a) Select the behavior of the widget outside of working hours in the window.
You can change the basic text of the message about the unavailability of the widget and sending an e-mail.
b) Select the behavior of messengers in the box after hours.
You can change the basic text of the message about the unavailability of instant messengers.Notifications for unanswered messagesEnable (switch to the right) or disable (switch to the left) the reminder.
1. First reminder - set the switch to the desired position and specify the delay interval in minutes.
2. Second reminder - set the switch to the desired position and specify the delay interval in minutes.Bots- Connect Viber, Telegram or Facebook messengers to the chat:
1. Via CHAT4 gateway by moving the switch to the left.
2. Through your bot, move the switch to the right and write the code in the `token` field.
- Connect clients to the chat in several ways:
1. Provide for scanning the QR-code of a convenient communication channel in the form of a picture or photo.
Click on it with the right mouse button and select `Save picture as ...`
2. Send the client a direct link to a convenient communication channel in any convenient way.WidgetWidgetAdjust the view of the widget:
1. Button shape - section“ Button corners radius ”.
2. Button Color - Button Background palette.
3. Image inside the button - section“ Widget button icon ”.
You can enable“ Custom button icon ”by specifying the link (URL) of the image.
4. The size of the image inside the button - section `Icon size`.Widget sliderAdjust the button slider view:
1. Slider color - section“ Slider ”, palette“ Background ”.
2. Slider text color - Slider section, Text Color palette.
3. Slider text - You can change the base text.Web chatAdjust the type of Web chat:
1. Header Background Palette.
2. Header Color palette.
3. Submit Icon palette.
4. Close Icon Palette.ChannelsConnect the communication channels convenient for you:
- Enable - Move the switch to the right.
- Disable - move the switch to the left.Place the widget on your siteClick `Copy to clipboard` and paste the code right before the closing HTML tag